Home / How it works
From an idea to the cut
A film is scenes, a scene is shots, a shot is a short script. You choose how it looks and what happens; ScriptedReel writes every prompt, splits shots into clips your video model can make and renders them on your own key.
Start a film and pick its look
In Film Studio → New film you only need five things: a rendering style (how every clip is drawn), a name, a description (@ names a character, # a place), the aspect ratio and the video provider — its price per second sits next to its name. Everything else is set in the studio once the film exists.
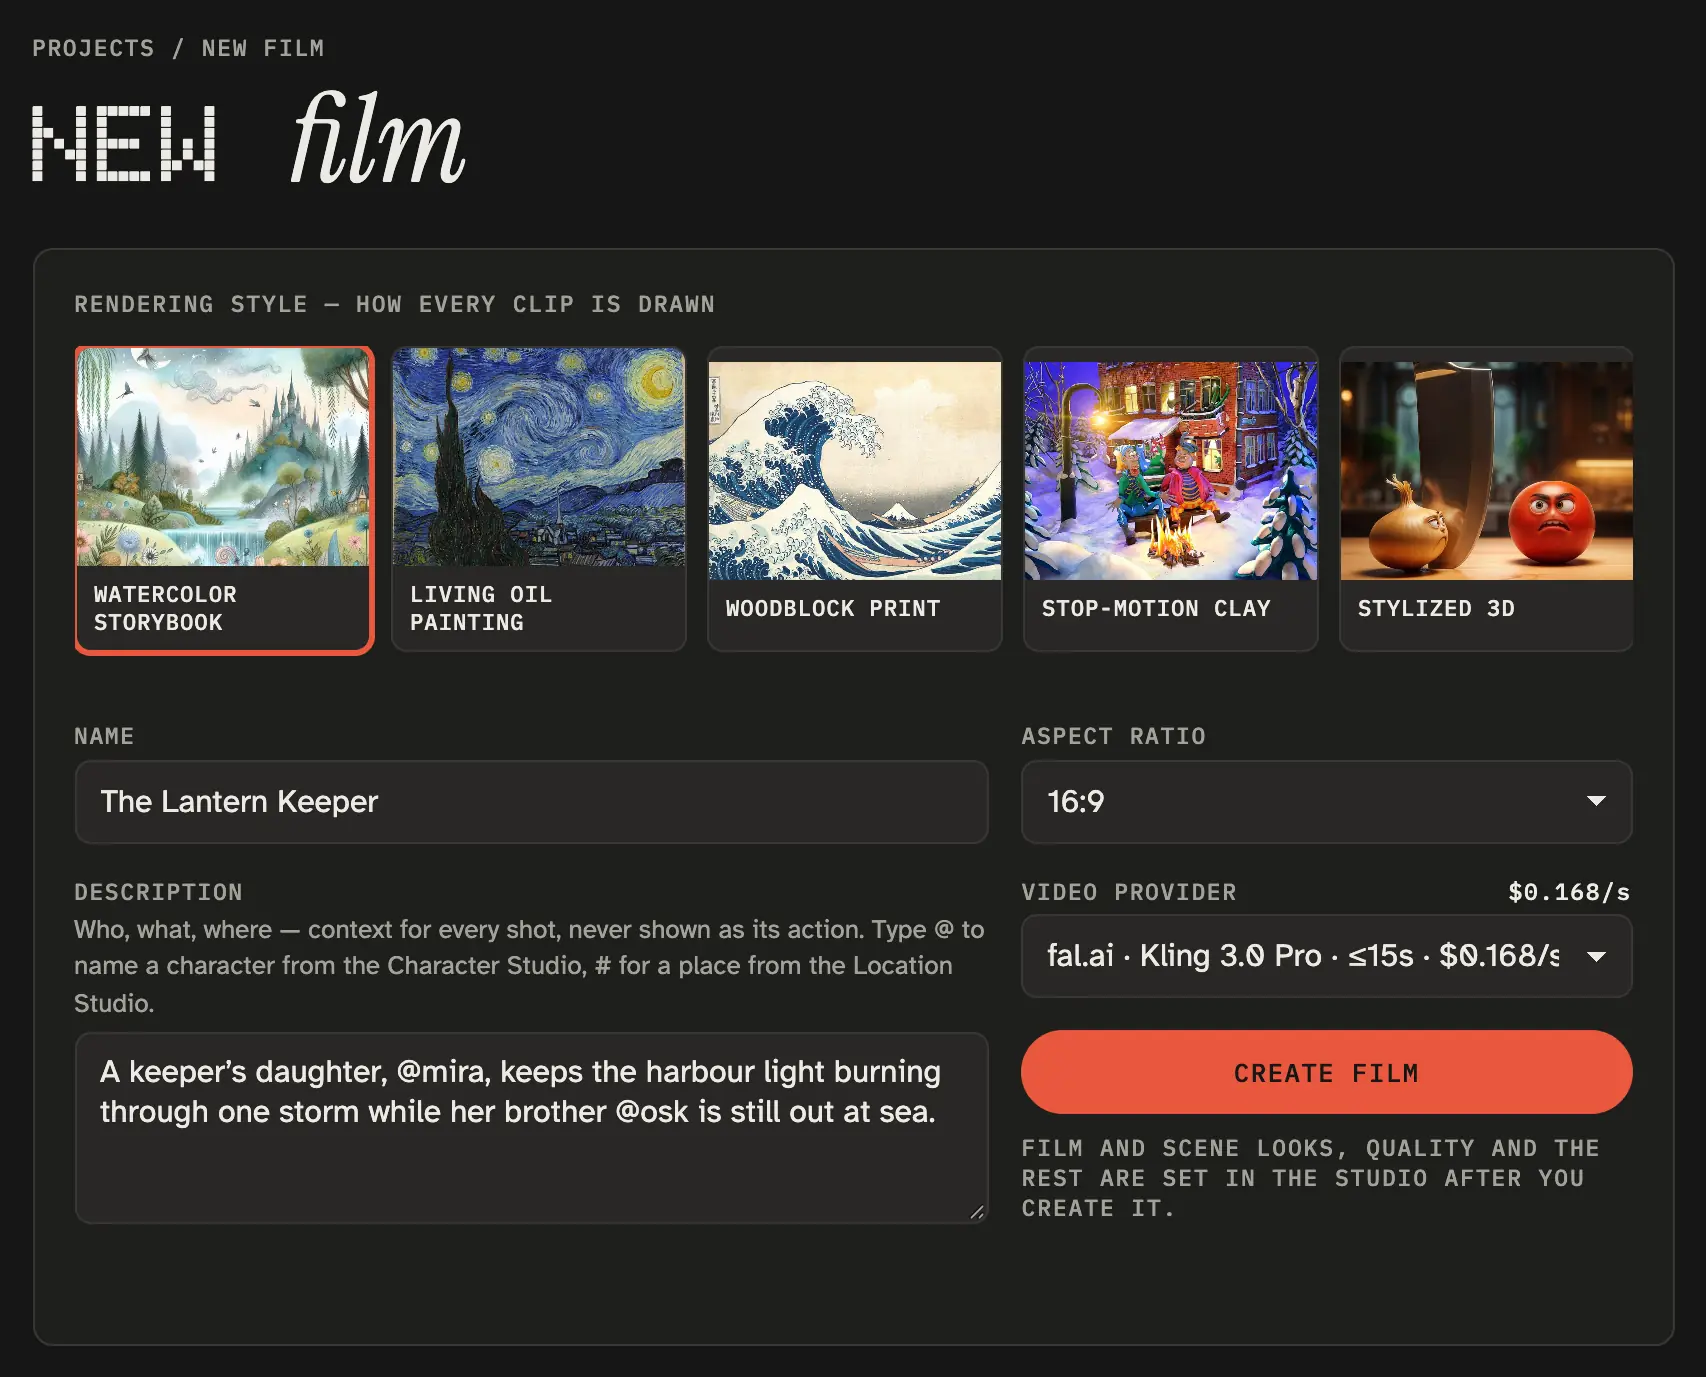
The look is set at two levels, each with its own categories. The film look goes into every clip; the scene look belongs to one scene, and each new scene starts as a copy of the one before. Closed, every category shows what it's set to — open one to change it.
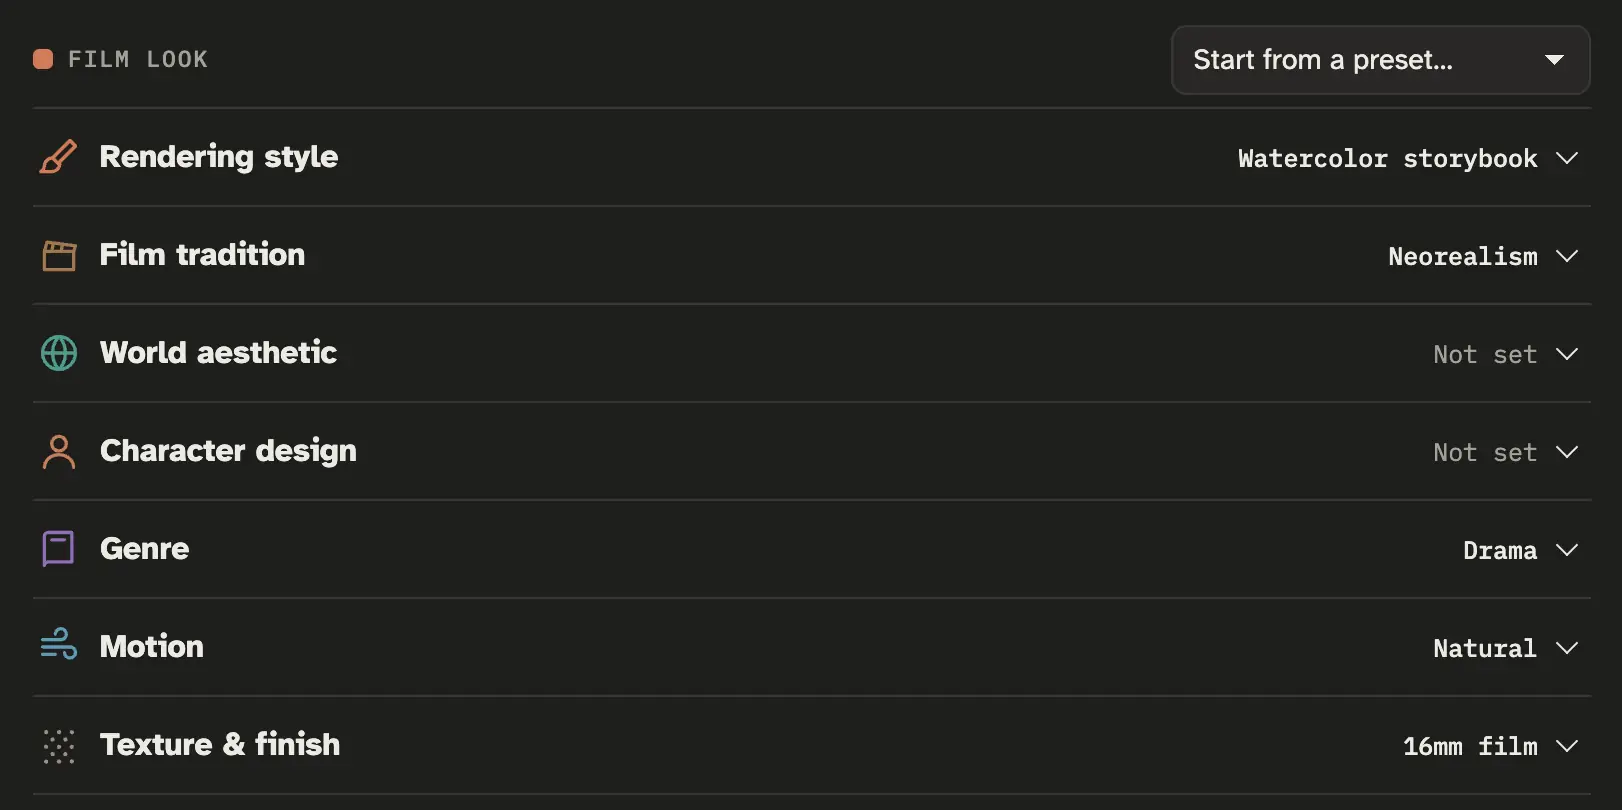
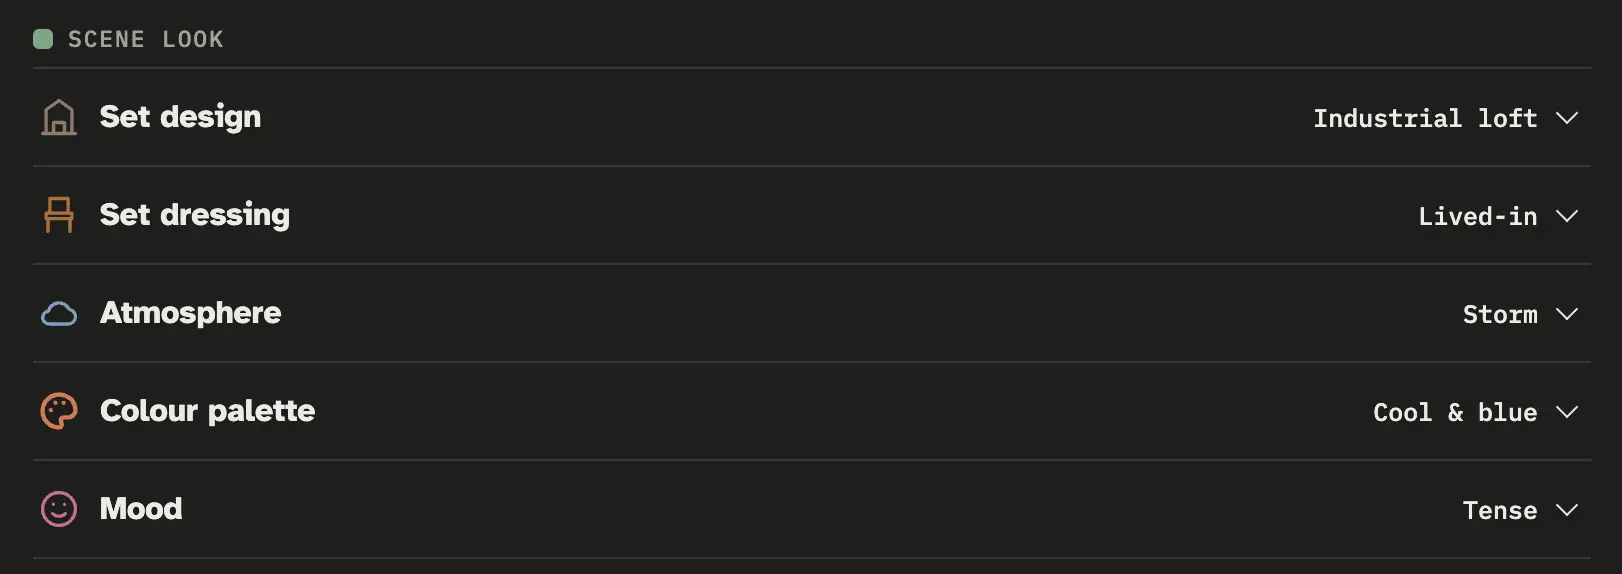
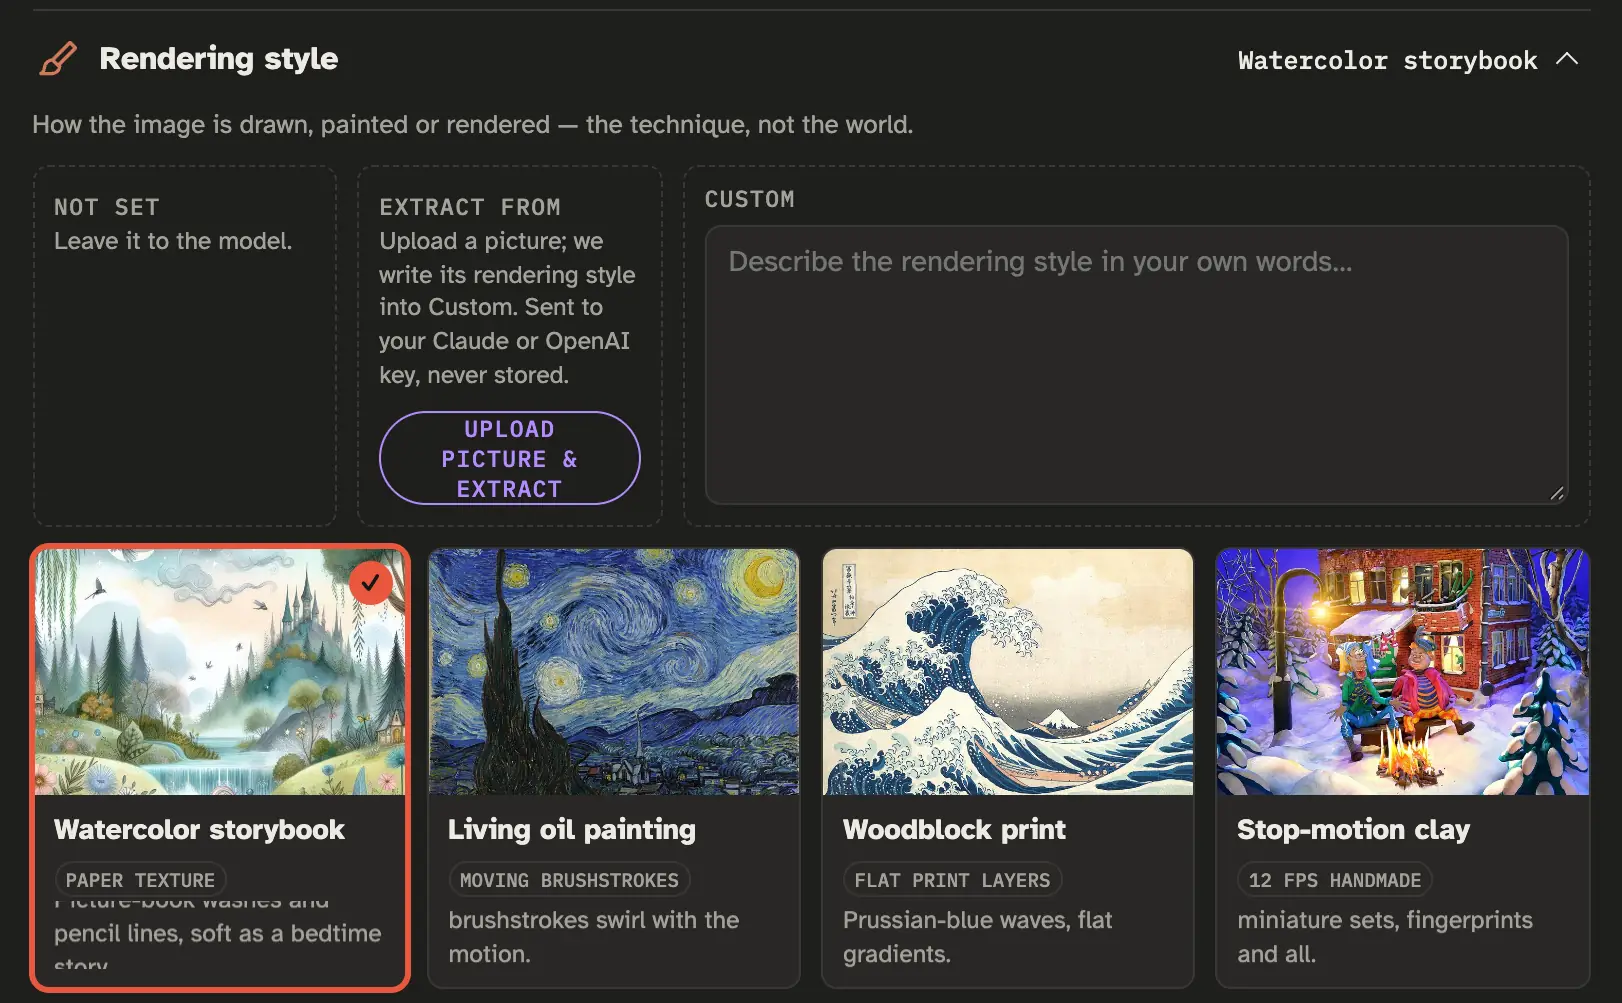
Every option is a picture card, so you pick a style by seeing it, not by naming it. Each category also takes Not set (leave it to the model), Custom (your own words) or Extract from — upload a picture and your Claude or OpenAI key writes its style into Custom. Film settings also hold the description, what to avoid and the video quality.
Add scenes
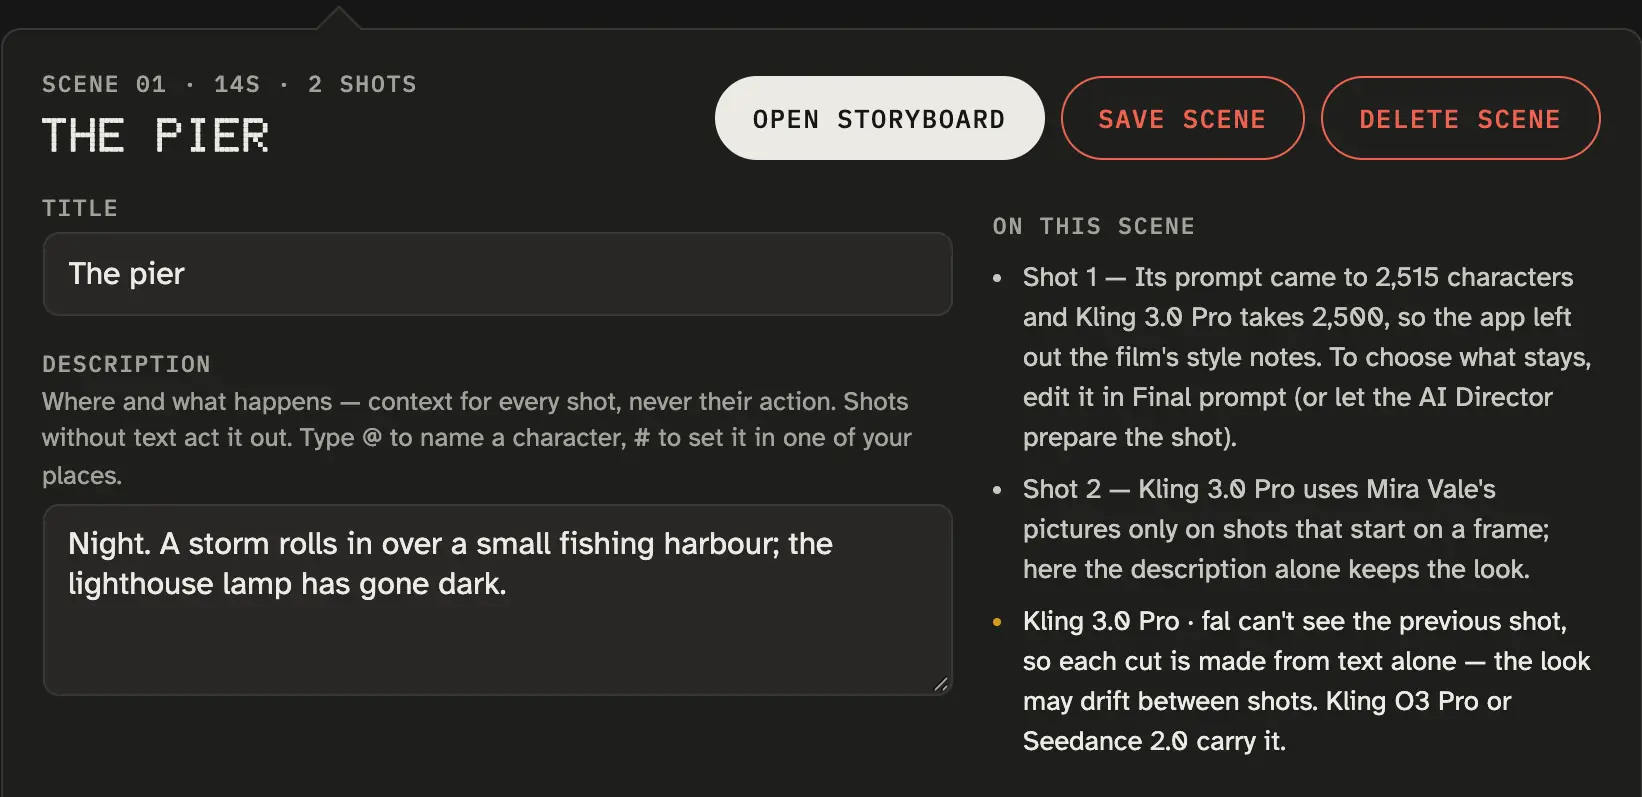
The film page is a reel of scenes. Add one with +, drag to reorder, click a scene to open its settings, double-click (or Open storyboard) to go into its shots.
- Description — where and what happens. It's context for every shot, never their action. Type
@for a character,#to set the scene in one of your places. - Scene look — set design, set dressing, atmosphere, colour palette, mood (step 1).
- On this scene lists what would come out wrong before you spend anything: model limits, continuity, the AI Director's notes.
Write the shots
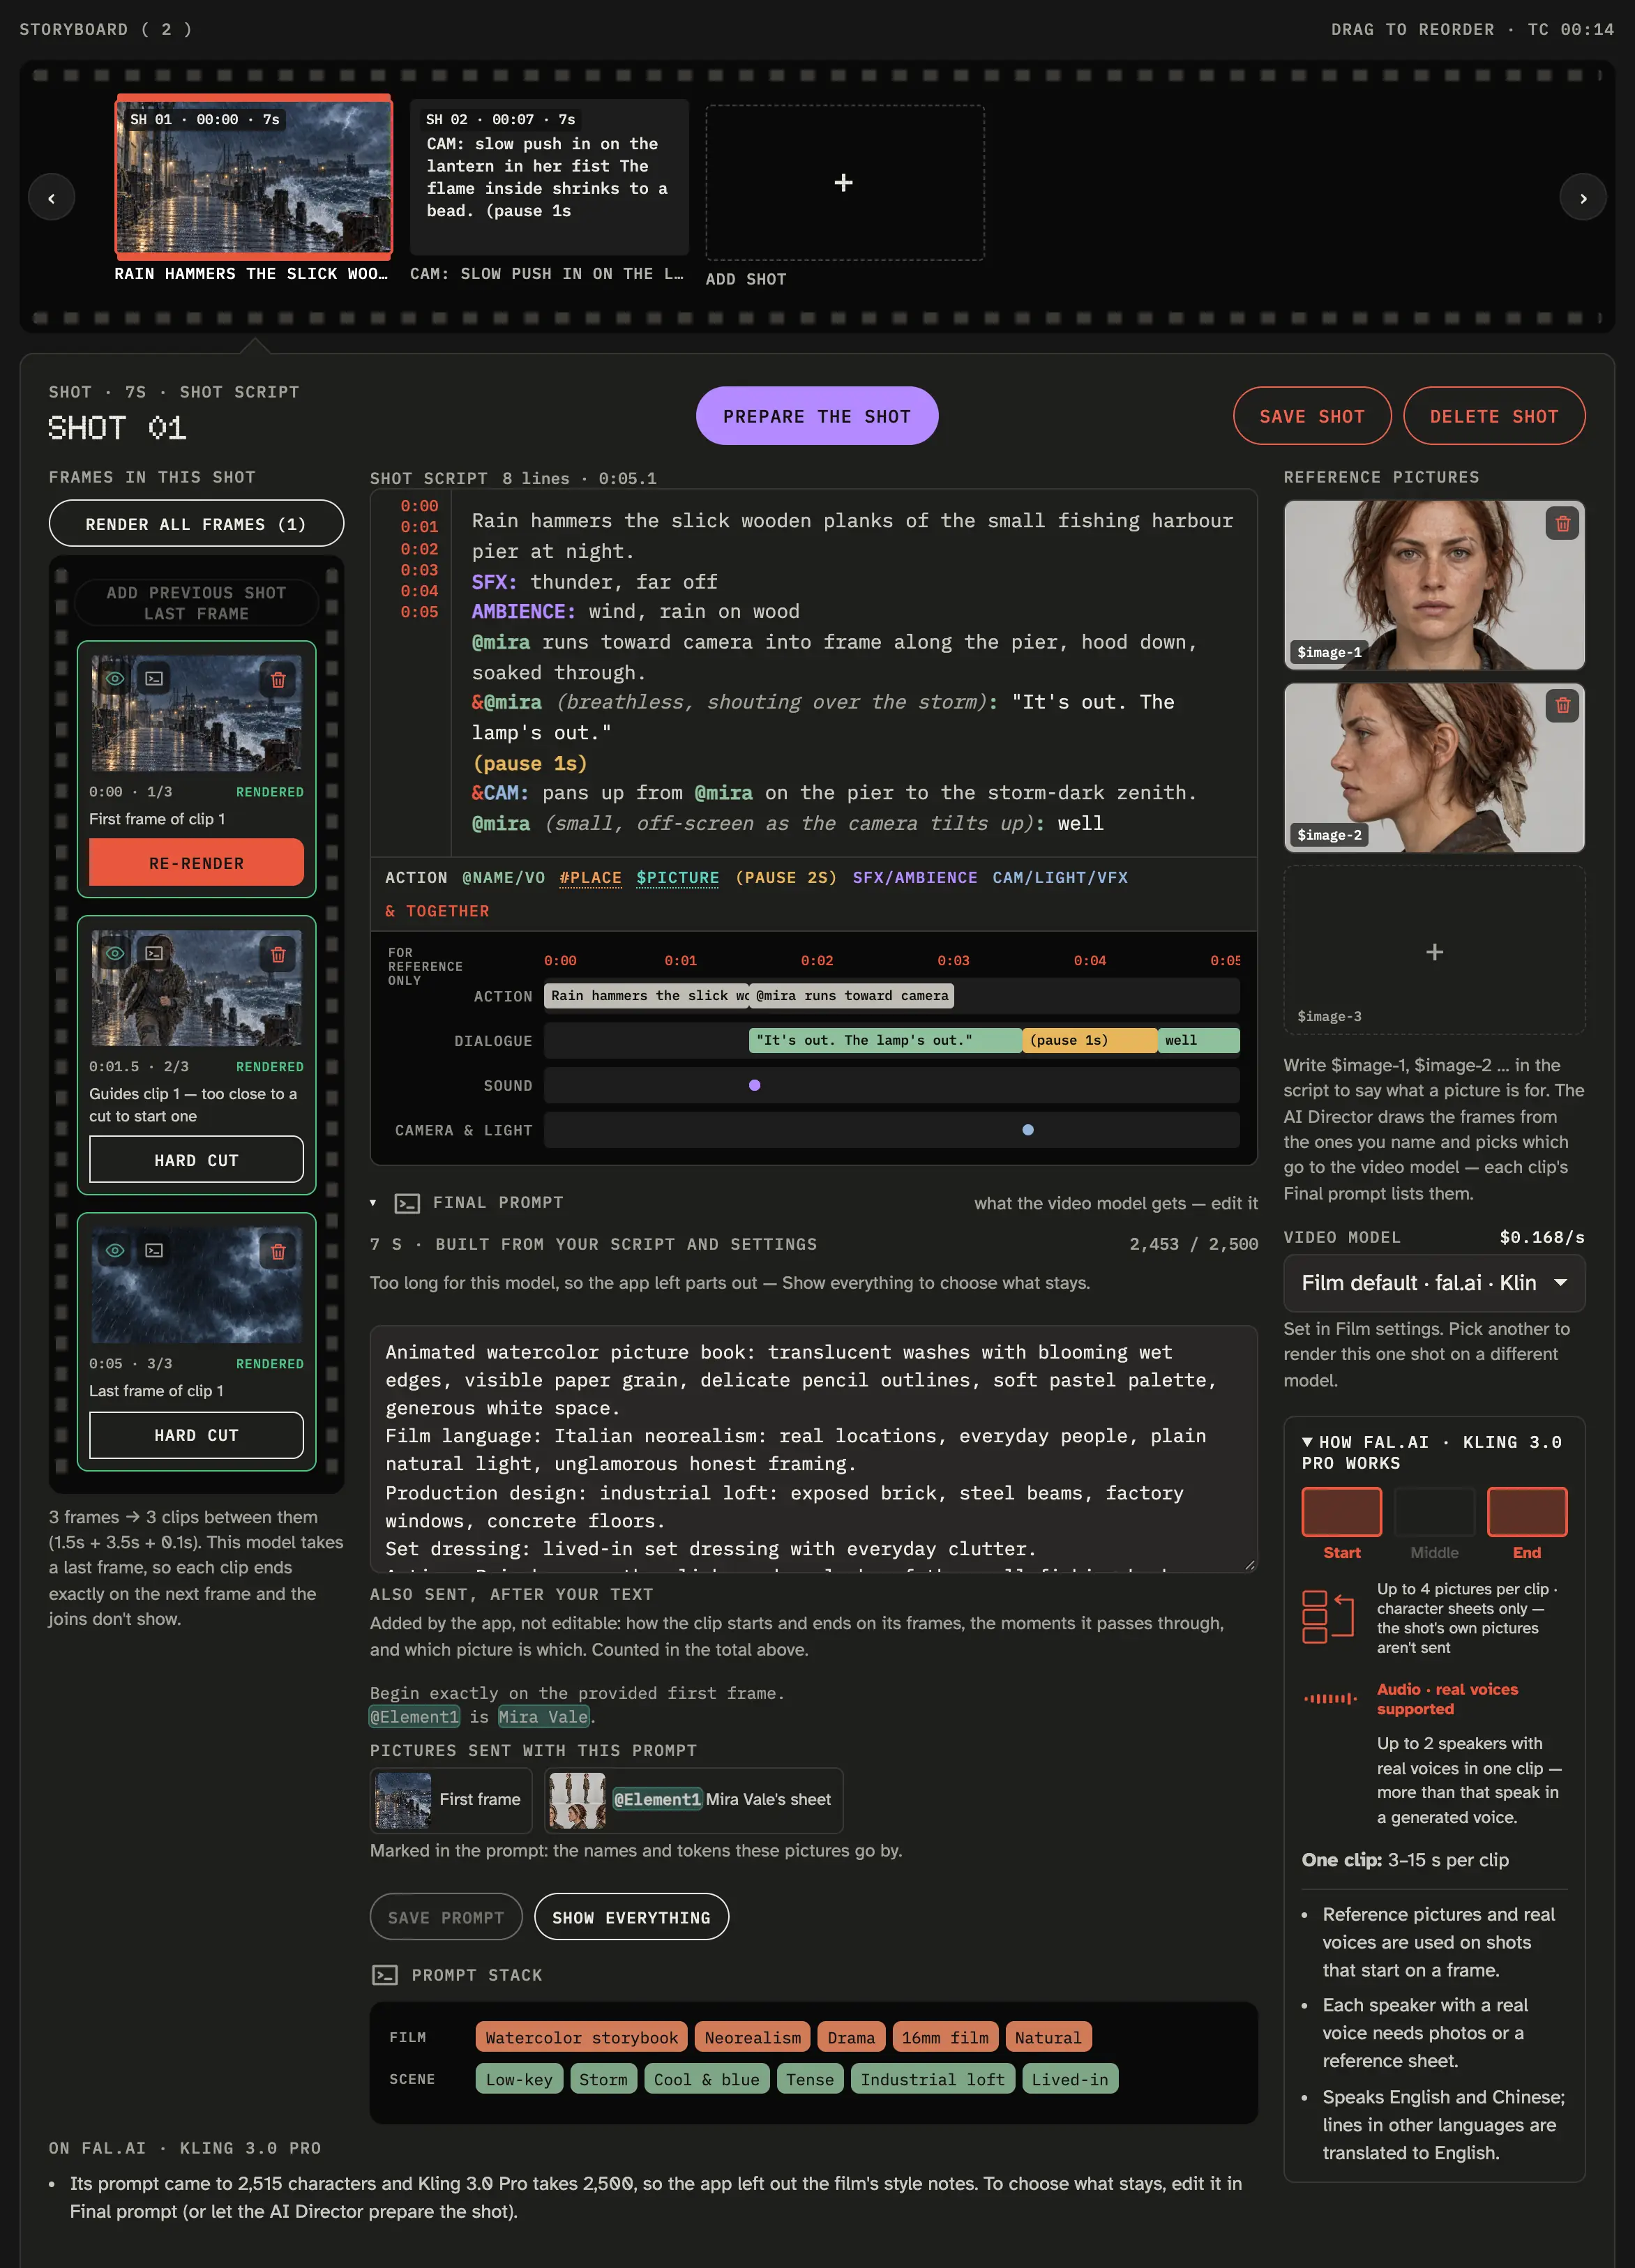
A scene's storyboard is a reel of shots. Select one and its panel opens below: frames on the left; the shot script, its lanes and the prompt stack in the middle; reference pictures and the video model on the right. Prepare the shot sits in the panel's header, the Director's notes under the frames and the final prompt right under the lanes.
The shot script
One field per shot. You write plain lines; each line is sorted by what it says and coloured as you type. The tag hints under the script list the tags — click them for what each one does.
Timecodes are worked out for you: speech at a natural speaking pace, an action line about a second and a half, pauses as written; sound and camera lines take no time. Video models never see a timecode — they get the order and the pauses. Timecodes decide where frames sit and where a shot is cut into clips.
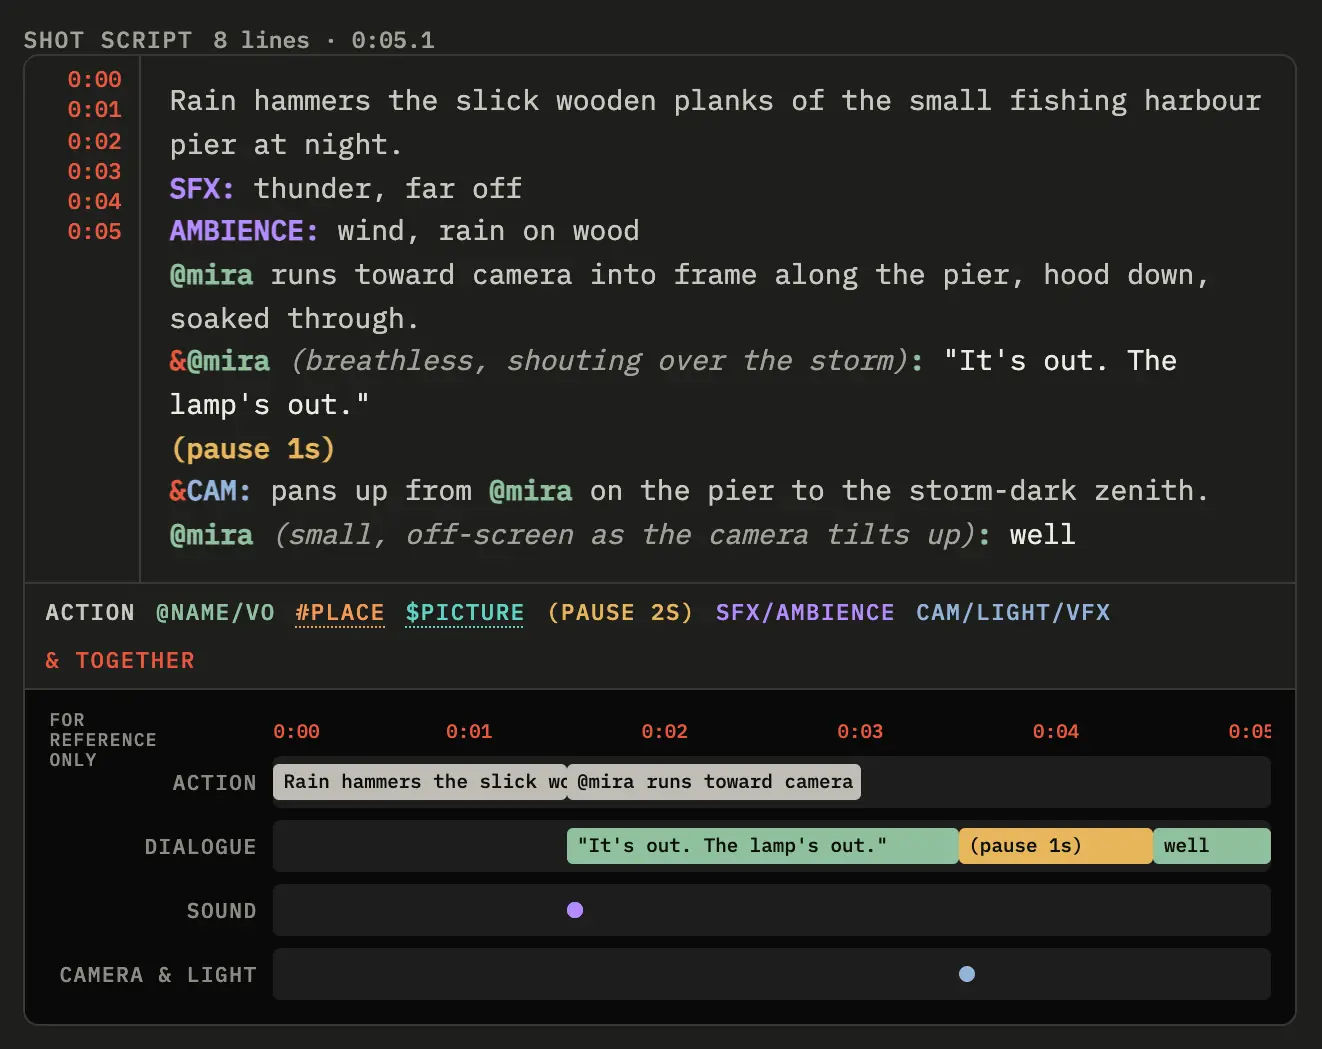
Lanes
Under the script, lanes lay the same lines on a timeline — action, dialogue, sound, camera & light — so you see what overlaps, what runs long and where the gaps are. They're for reading: you edit the script, the lanes follow.
The frame reel
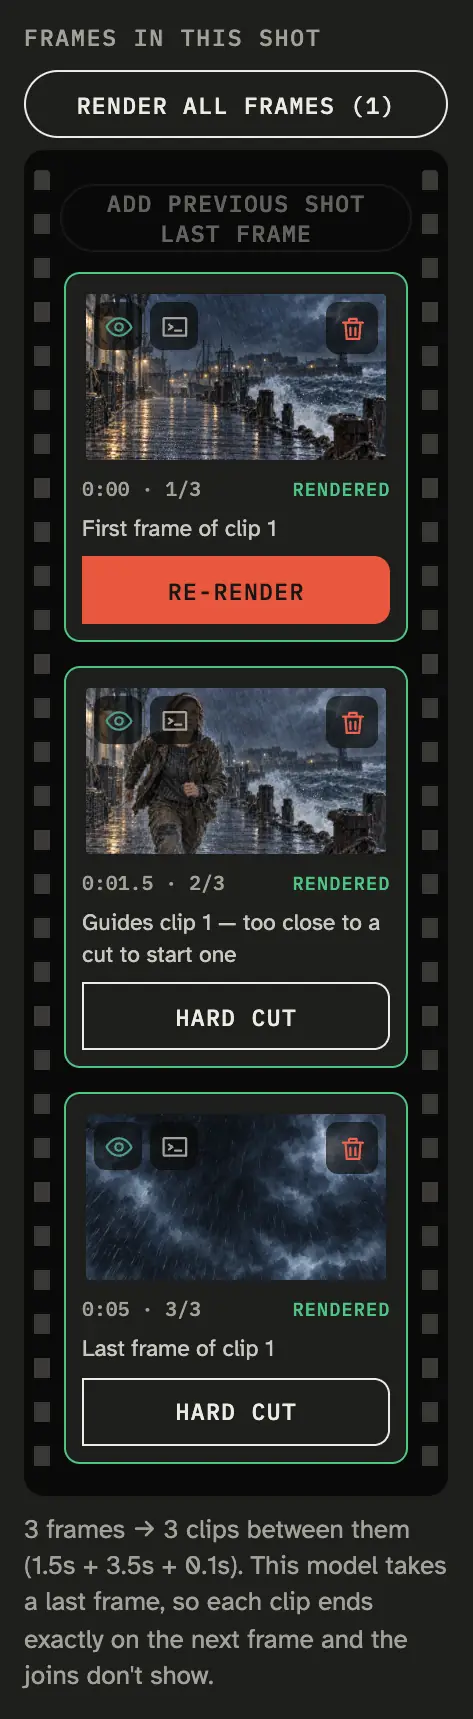
Frames are stills at points in the shot, on a vertical reel beside the script. They're optional — without them a shot renders as one clip.
- Add one by clicking a timecode in the script's gutter (a mark every second, a frame at any quarter second), or press Prepare the shot and the AI Director (Creator and Studio) proposes the moments, with a reason for each.
- Render a still on your image key, with the price shown first — or Render all frames behind one price. Renders keep up to six variations — flip through them with ‹ n/m › and the clip uses the one you pick. Re-render appears only when the wording, the still's own prompt or its pictures changed.
- A key frame can cut the shot. The frame at 0:00 opens the clip. A later key frame starts a new clip as long as every clip stays long enough for the model — otherwise it guides its clip as a reference — and where the model takes a last frame, the clip before ends exactly on it, so the joins don't show. A ref frame never cuts; it only feeds other stills and clips.
- Add previous shot last frame carries the last picture of the shot before into this one, for continuity.
- Reword a still and it's yours: the next Prepare the shot keeps it and plans the rest around it.
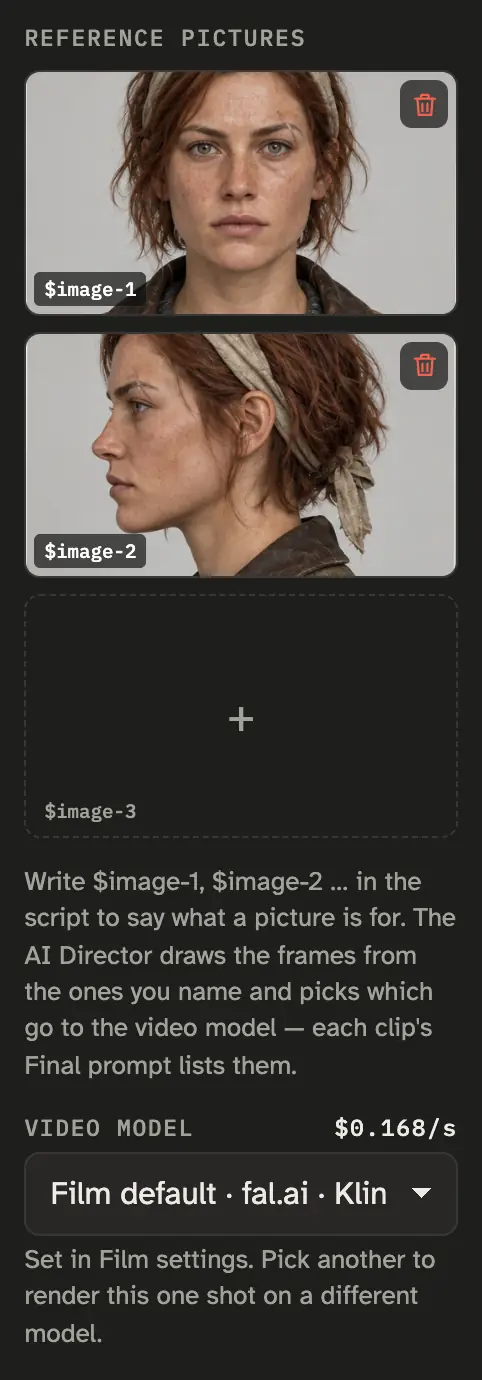
Reference pictures
Add pictures that show what the shot needs — a face, a prop, a costume, a place. They're named in order, $image-1, $image-2… — $ is a picture, @ a character — and you write those names in the script to say what each is for.
- Still renders always use them; the AI Director draws the frames from the ones the script names and decides which go to the video model. Each clip's Final prompt lists every picture it sends, and marks their names in the prompt.
- The video gets them on models that take reference pictures — the model guide under the picker says what yours accepts, and the panel warns when it won't.
- PNG, JPEG or WebP, up to 10 MB each. Location data is stripped.
Below them, Video model lets one shot render on a different model from the rest of the scene.
Prepare the shot
With the AI Director (Creator and Studio), Prepare the shot reads the whole film and, in one pass, plans the shot's frames and their reference pictures and writes every clip's video prompt into Final prompt: only what the script says happens, with the camera, the set and the light pinned down. Its notes — what the script still leaves open — stay under the frames; fix the script and prepare again, and it picks up from its notes. Without the Director, Prepare the shot builds the prompt from your script and the film's and scene's settings.
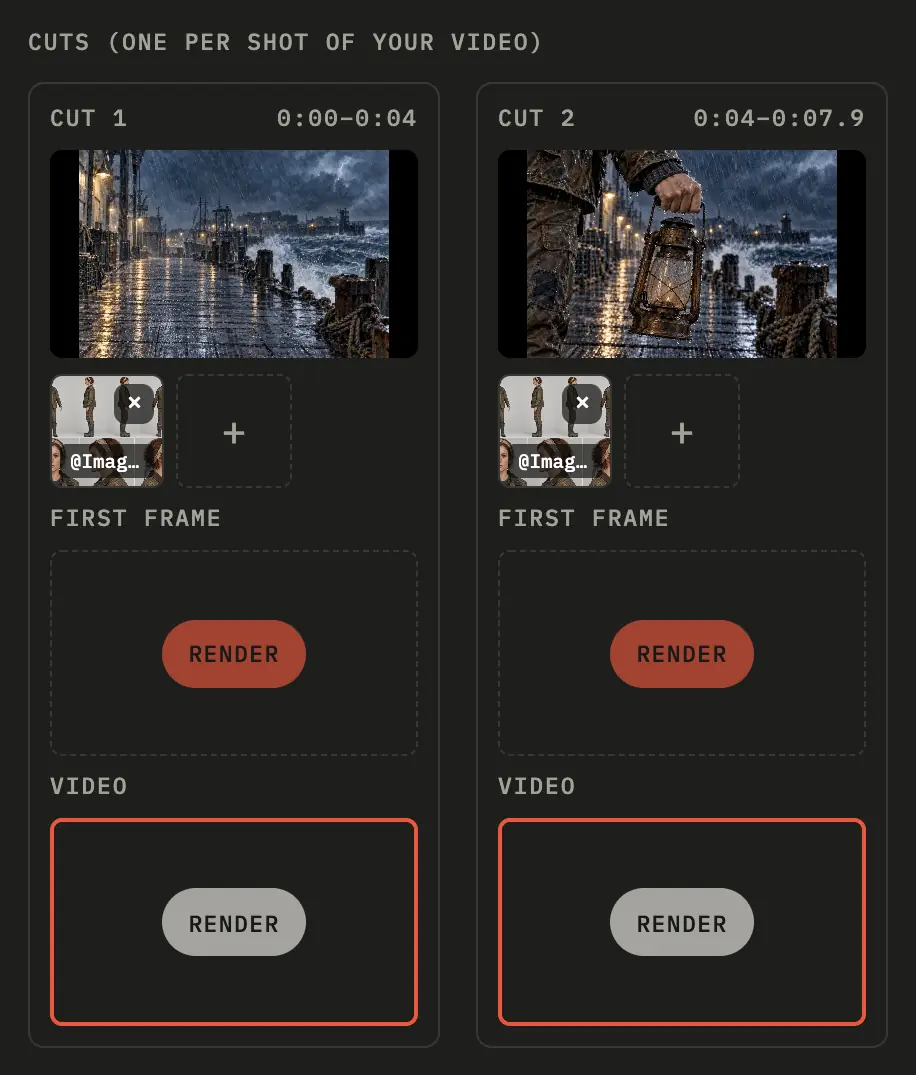
Restyle or lip-sync your own video
Add shot asks what kind of shot you want: a written one, or one made from your own footage. A shot is one kind only.
- Restyle my video (Creator and Studio): upload any video, 3–60 s, your own or an edited one with cuts. Each cut is restyled on its own: its first frame is redrawn with the
@characteror#placeyou pick, then the cut's video is edited to follow it. Movement, timing and camera stay as they are. - Lip-sync & dub (Creator and Studio): upload a video and the recording its lips should follow — a new line, your own voice, a voice actor, or the same lines in another language. The shot becomes your video with the new mouth movement, priced per minute on your key.
Build your cast and places
Characters and places live outside any one film, so you reuse them. Make them before you write, or whenever a script first names them.
Character Studio
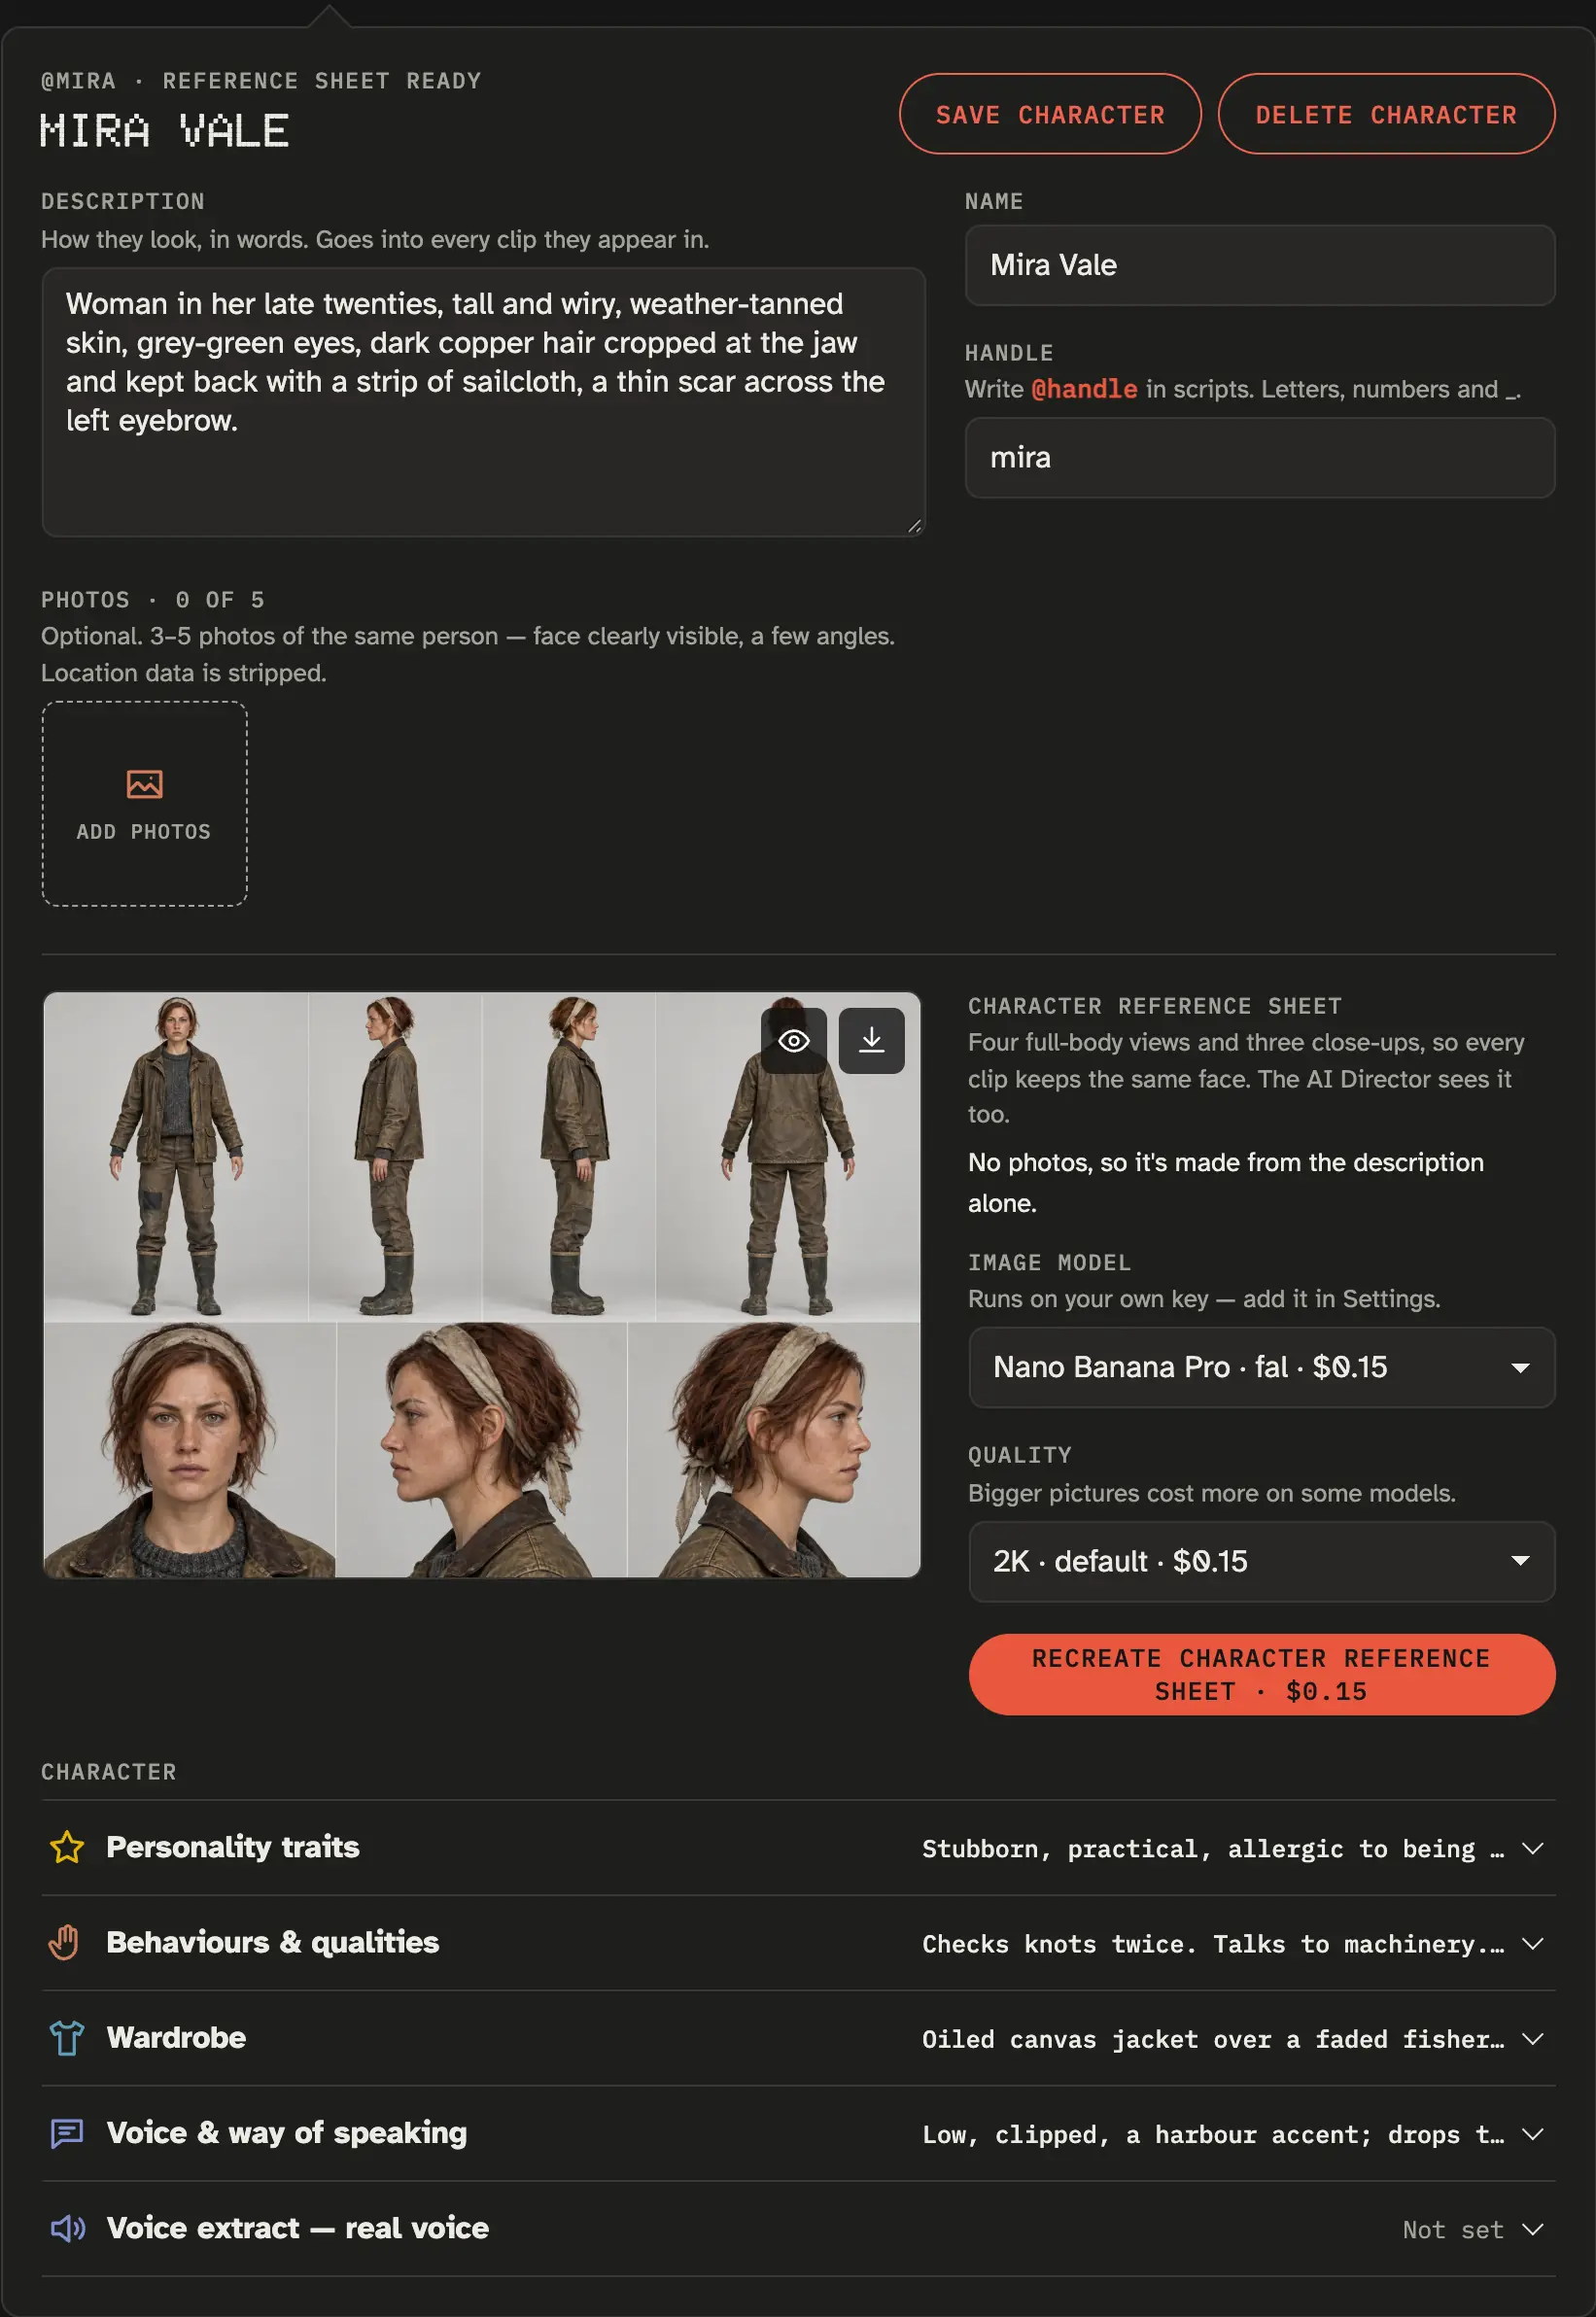
- Give a character a name, a
@handleand a description — how they look, in words. - From words, or from photos too: add 3–5 photos of the same person (face clearly visible, a few angles) or leave it to the description.
- Create the reference sheet on your image key: four full-body views and three close-ups, so every clip keeps the same face. The AI Director sees it too.
- Personality, behaviours, wardrobe and way of speaking go into every clip they're in. Write
@mirain any script and she's described the same way each time.
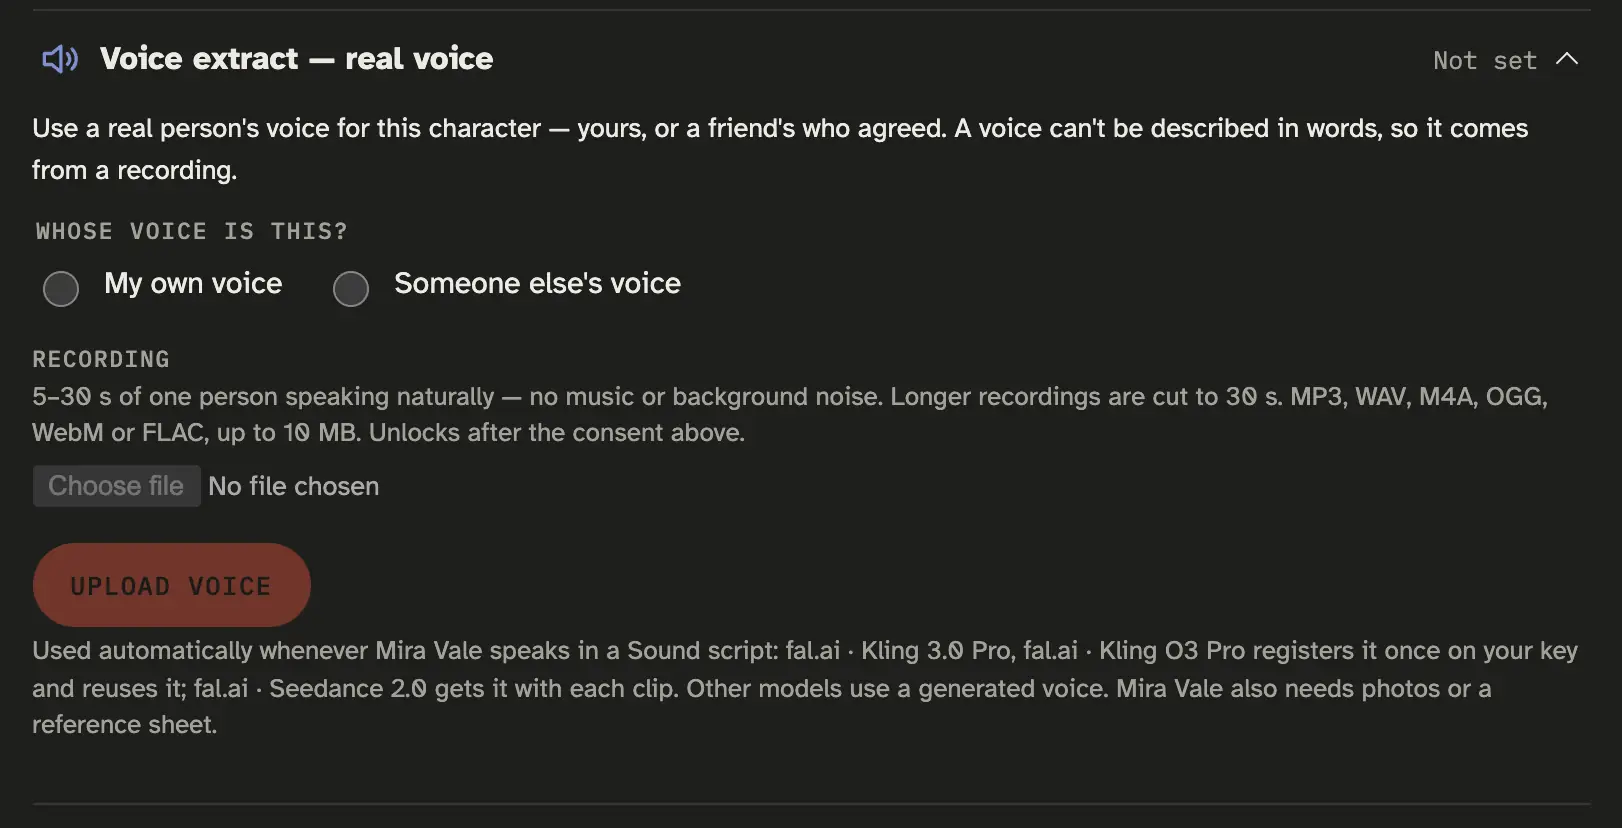
Voice extract gives a character a real voice — your own, or someone's who agreed — from 5–30 s of one person speaking. The upload unlocks only after you say whose voice it is and confirm their consent. It's used on models that take real voices; the model guide says how many speakers fit in one clip.
Location Studio
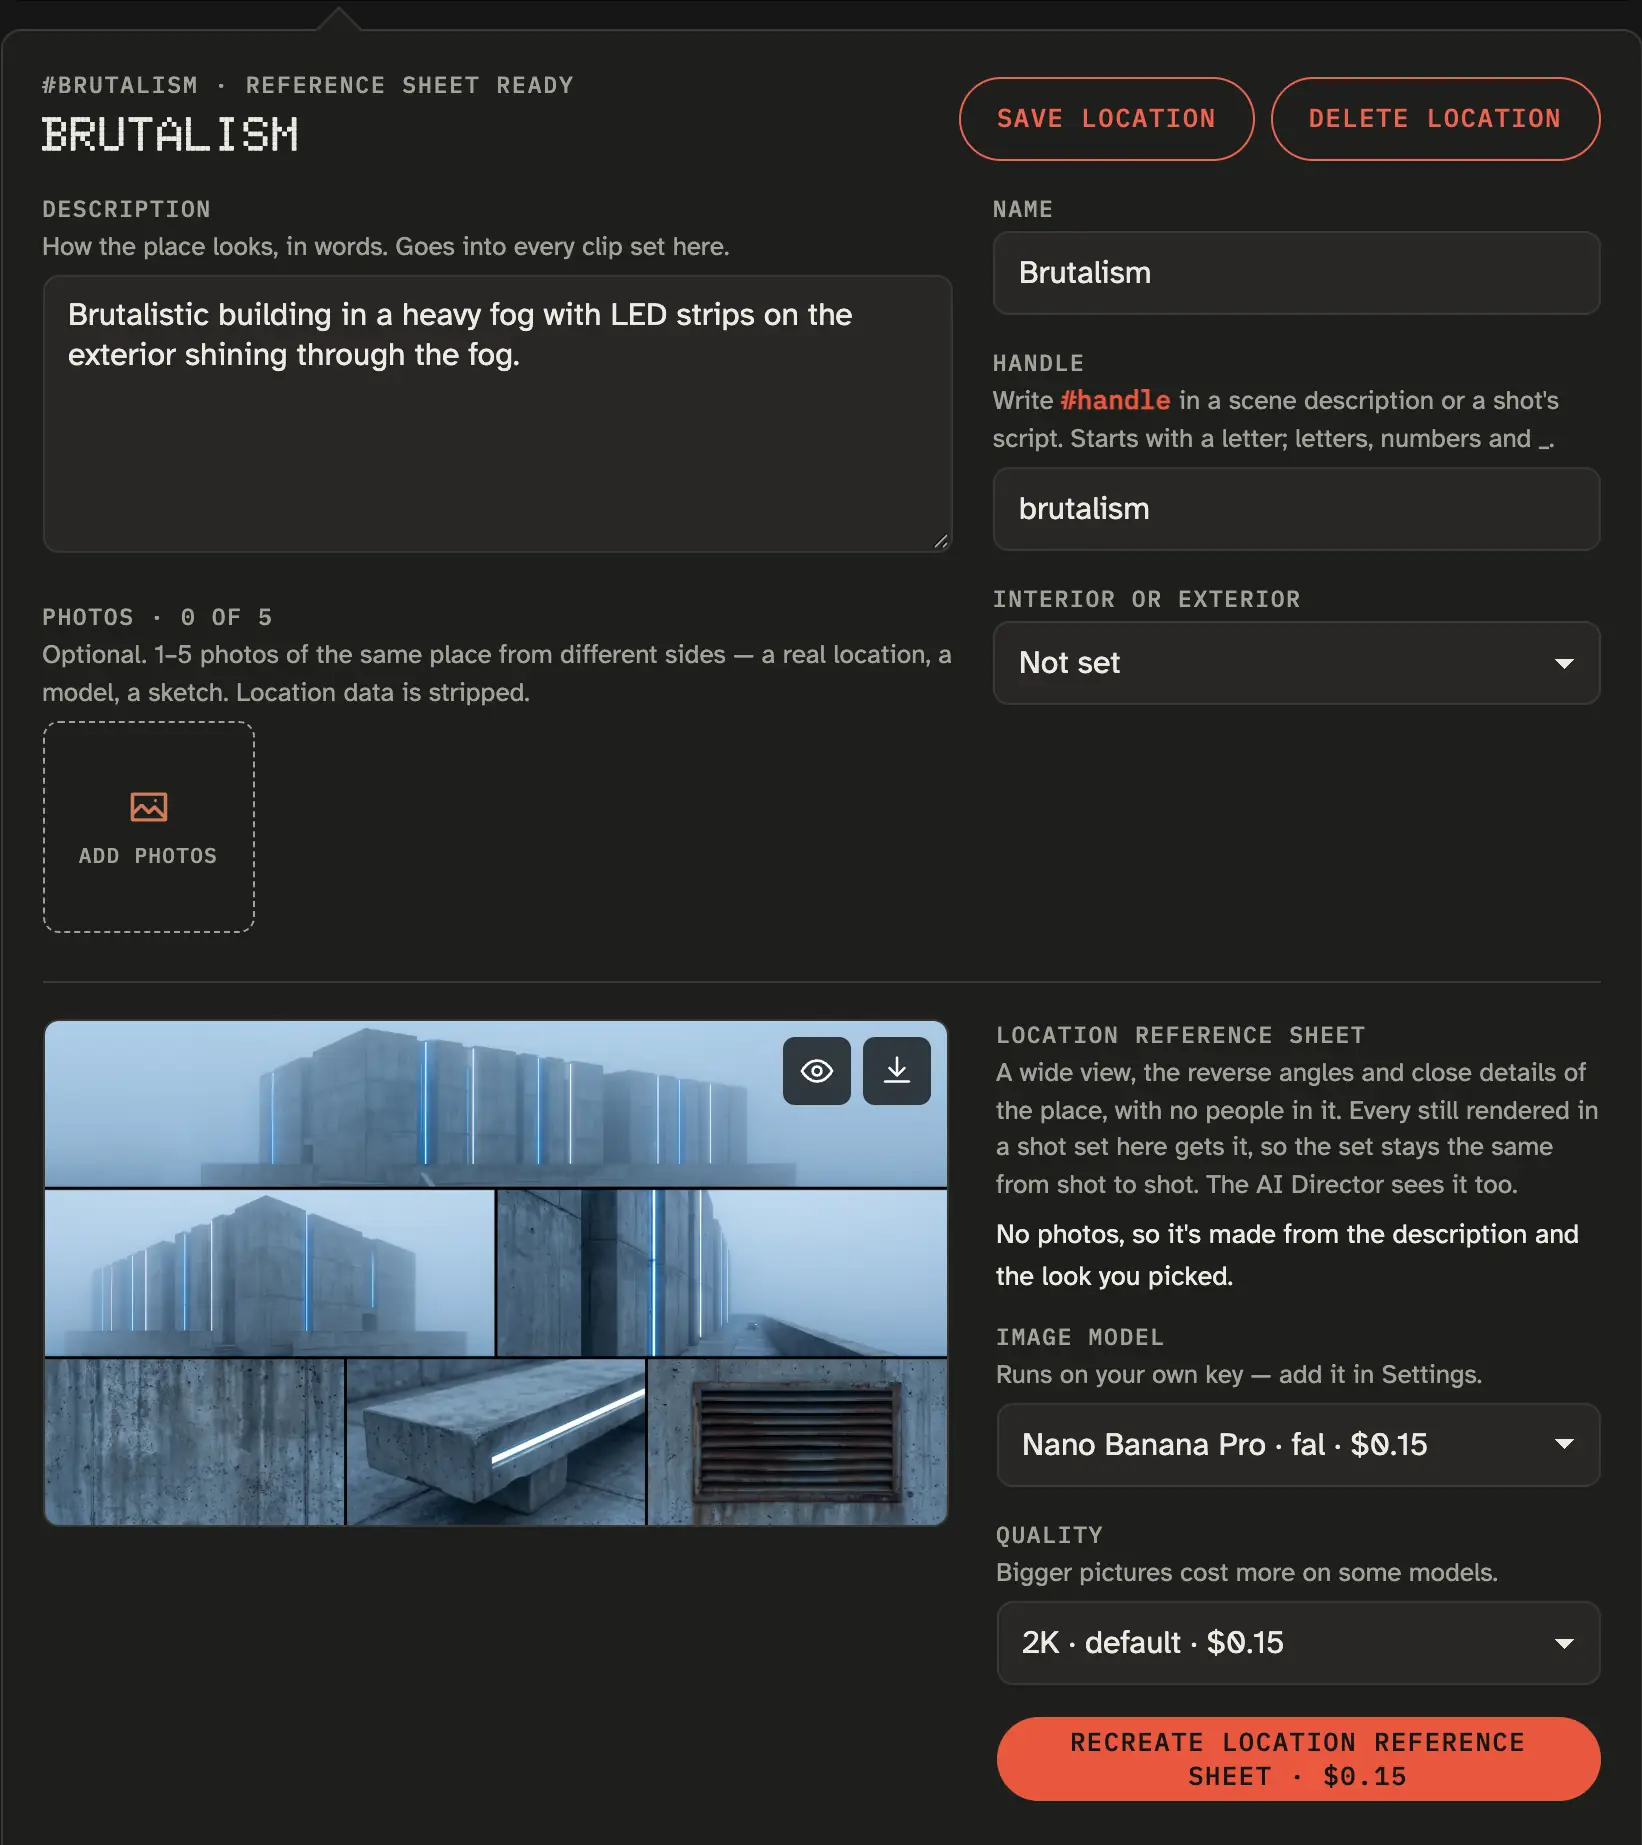
- A place has a name, a
#handle, interior or exterior, and a description — or 1–5 photos of it from different sides: a real location, a model, a sketch. - Its location reference sheet — a wide view, reverse angles and close details, no people — goes to every still set there, so the set stays the same from shot to shot.
- Look of the place replaces the film's world aesthetic and the scene's set design and dressing wherever it's used. Write
#harbourin a scene description to set the whole scene there, or in one shot's script for that shot.
Render
- Render a shot to get a take. Before anything is spent you see every prompt and the price on your key; renders above your spending cap are blocked.
- Render the scene once each shot has a take — the scene is assembled from them. Render the whole film the same way, into one MP4.
- Finished takes are reused, never billed twice. Change a shot and only that shot needs a new take.
Let the AI Director write it
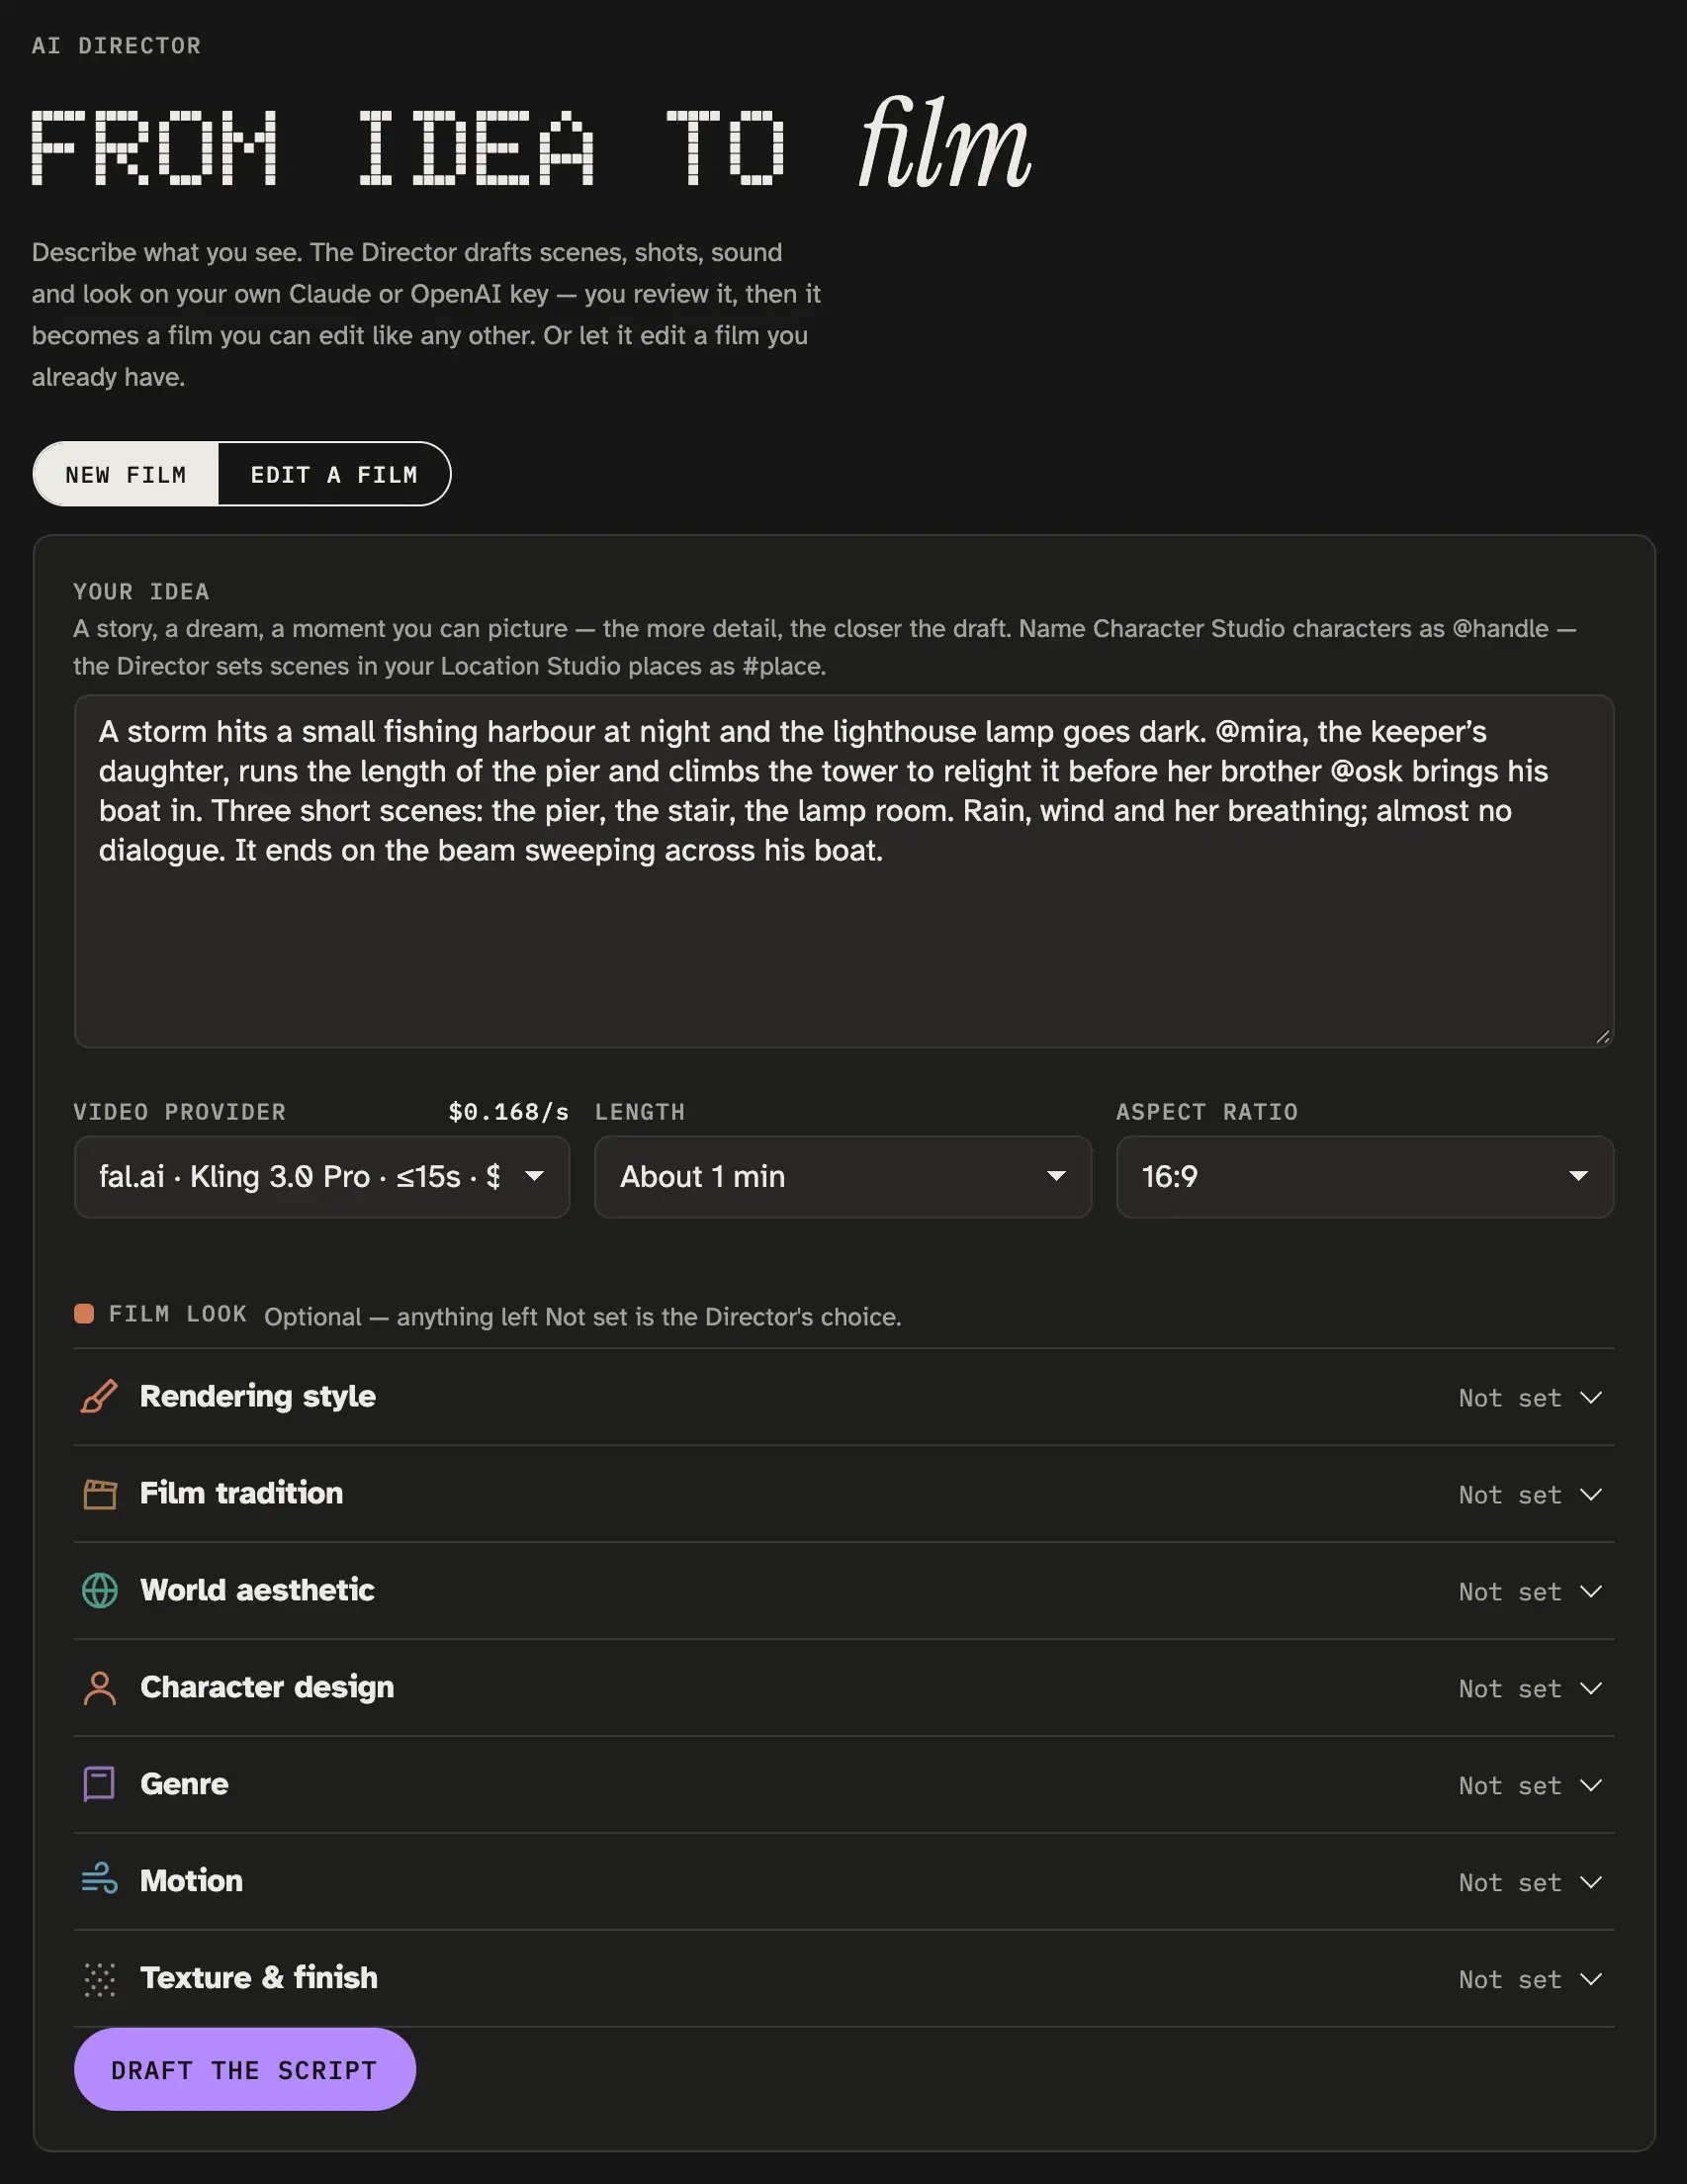
Open AI Director, describe what you see — a story, a dream, a moment — and press Draft the script. You get scenes, shots, sound, cast, places and look to review; then it becomes a film you edit like any other, through steps 2–5.
- Name Character Studio characters as
@handleand places as#place, and the draft uses them. - Pick the video provider, length and aspect ratio.
- Film look (optional): the same categories as Film settings — pick a card, write your own, or Extract from a picture. Anything left Not set is the Director's choice.
- Already have a script? Import a
.jsonscript file — the same format Export writes.
AI Director is on Creator and Studio and runs on your own Claude or OpenAI key.
Your first scene is one shot away
Free to start, no card — renders bill your own provider key. AI Director from Creator, €29/month.
Start your first film — free